
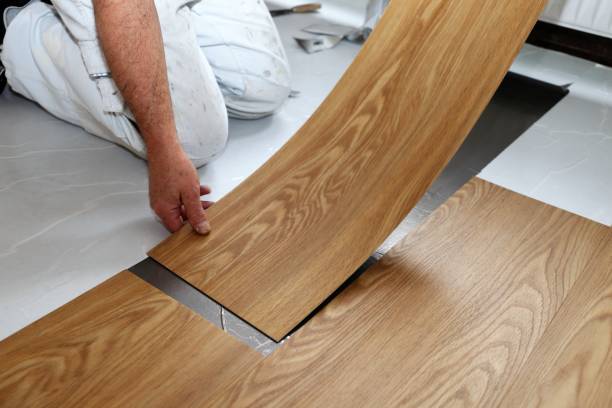
Learning how to install vinyl plank flooring is one of the best beginner DIY projects you can take on. It’s waterproof, durable, affordable, and clicks together without any glue or nails — and most beginners can floor an entire room in a day.
What You’ll Need
Vinyl plank flooring (measure your room and add 10% for waste), Underlayment (if not pre-attached to planks), Utility knife and straight edge, Tapping block and pull bar Rubber mallet, Spacers Tape measure and pencil Circular saw or jigsaw for complex cuts
Step 1 — Prepare the Subfloor
The subfloor must be clean, dry, and flat. Sweep and vacuum thoroughly. Fill any low spots with floor leveling compound. High spots above 3/16 inch per 10 feet need to be sanded down. Vinyl plank over an uneven subfloor will result in planks that flex, crack, and separate.
Step 2 — Acclimate the Flooring
Leave the unopened boxes of flooring in the room for 48 hours before installation. This lets the material adjust to the room’s temperature and humidity and prevents expansion and contraction issues after installation.
Step 3 — Plan Your Layout
Measure the width of the room and calculate how wide the last row of planks will be. If it’s less than 2 inches, cut the first row narrower so the last row is wider and more balanced.
Step 4 — Install the First Row
Place spacers along the wall to maintain a quarter-inch expansion gap. This gap is essential — vinyl expands and contracts with temperature changes. Start with the groove side facing the wall. Click the short ends of planks together as you go.
Step 5 — Install Subsequent Rows
Stagger the joints between rows by at least 6 inches for structural integrity and appearance. Angle the plank and click the long edge into the previous row, then press down to lock it in.
Step 6 — Cut Around Obstacles
For doorways, vents, and corners, make a cardboard template and trace it onto the plank before cutting. A utility knife scores and snaps straight cuts easily. Use a jigsaw for curves.
Step 7 — Install the Last Row
Measure and cut the last row to width. Use a pull bar and rubber mallet to click it into place since you won’t have room to angle it in.
Step 8 — Install Trim and Transitions
Remove spacers and install baseboards or quarter round trim to cover the expansion gap. Add transition strips in doorways.
Final Thoughts
Vinyl plank flooring installation saves $2 to $5 per square foot in labor costs. In a 200 square foot room, that’s $400 to $1,000 in savings. This is one of the highest-value DIY skills you can learn.
Just moved into a new home? Check out our guide on what to do when you move into a new house.
Disclosure: This post contains affiliate links. If you click and make a purchase, FourByFourDIY earns a small commission at no extra cost to you.


Leave a Reply