
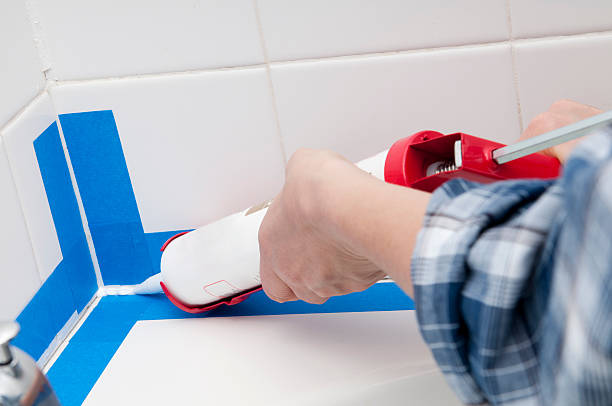
Learning how to caulk a bathtub for the first time is one of those jobs that’s genuinely beginner-friendly. The caulk line around your bathtub keeps water out of the wall behind the tile — and when it cracks, peels, or grows mold, it needs to be replaced, not just patched over. It takes about two hours, costs under $10, and makes your bathroom look noticeably better.
Why You Can’t Just Caulk Over Old Caulk
Applying new caulk over old caulk seems like it would work, but it almost never does. The old caulk is likely already failing — cracked or not fully bonded. New caulk on top will look bad and fail just as quickly. You have to remove the old stuff first. This is the part most people skip, and it’s why their caulk job looks bad and doesn’t last.
What You’ll Need
A caulk removal tool or utility knife, painter’s tape, a tube of 100% silicone caulk (for tubs and showers — not latex), a caulk gun, a spray bottle with rubbing alcohol, and a smooth tool or wet finger for finishing. Budget about $15-20 total. Get silicone specifically — it’s more flexible and more water-resistant than latex for wet areas.
Step 1 — Remove All the Old Caulk
Score along both edges of the old caulk with a utility knife, then work a caulk removal tool or putty knife underneath it to peel it away. It should come off in strips if it’s already loose. For stubborn spots, a caulk remover chemical (about $5) softens it significantly. Get every last bit — any old caulk left behind will prevent the new caulk from bonding properly.
Step 2 — Clean and Dry the Surface
Spray the entire area with rubbing alcohol and wipe it down thoroughly. This removes soap residue and any mold. Let it dry completely — at least 30 minutes, or longer if the area has been wet recently. New caulk will not adhere to a wet or dirty surface. This waiting step is not optional.
Step 3 — Apply Painter’s Tape
Run two lines of painter’s tape — one on the tile side and one on the tub side — leaving just the gap between them exposed. This is what gives you a clean, straight caulk line. Press the tape edges down firmly so caulk doesn’t bleed under them. The gap should be about the width of a pencil.
Step 4 — Apply the Caulk
Cut the tip of the caulk tube at a 45-degree angle. Load it into the caulk gun. Hold the gun at about 45 degrees to the joint and apply steady, even pressure as you draw it smoothly along the gap in one continuous pass. Don’t stop and start. Apply a bead that slightly overfills the gap — you’ll smooth it down next.
Step 5 — Smooth and Remove Tape
Wet your finger with water and run it along the caulk bead in one smooth stroke, pressing it into the gap and feathering the edges. Then immediately remove the painter’s tape while the caulk is still wet — pull it at an angle, slowly. Waiting until the caulk dries makes tape removal much harder and can ruin the line.
Step 6 — Wait Before Using the Tub
Silicone caulk needs at least 24 hours to cure — some products say 48. Don’t use the tub or get the caulk wet during this time. Read the label on your specific product. Once cured, the caulk will be flexible, waterproof, and should last several years before needing replacement.
Disclosure: This post contains affiliate links. If you click and make a purchase, FourByFourDIY earns a small commission at no extra cost to you.
 FourByFourDIY
Leave a comment